DIY Wedding Hair: Easy Elegant Bridal Up-do – Guest Post
DIY Wedding Hair: Easy Elegant Bridal Up-do
Doing your own hair on the big day is a great option for all you brides-to-be on a budget. Why fork out for a hairdressing pro when you can create this beautiful bridal updo in just seven simple steps? An elegant low bun with added texture and sparkle to make it as special as your big day – it’s a chic, versatile look that nobody will ever guess you did yourself.
Take a look at this easy-to-follow video tutorial to find out exactly how it’s done. And hey, why not allocate the money you save over to the fizz budget? You’ll thank us later!
Equipment you’ll need:
Clip-in hair extensions for extra volume
A hairbrush
Your curling wand
A comb
Some clear hair elastics
Plenty of hair grips
A beautiful, decorative hairpin
Some hairspray
Nothing too scary there, right?
STEP 1 – Apply your hair extensions
First things first, give your hair a brush so it’s nice and smooth.
Now clip in your hair extensions. If you’ve never used clip-in hair extensions before, we’ve got you covered. You can find a great tutorial with all you need to know over on the right here.
STEP 2 – Get curling
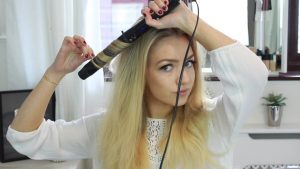
Next, you need to add some curls. This will give your updo some gorgeous texture and volume. Just grab your curling wand and start wrapping sections of hair around the barrel. Hold for a few seconds and release. Easy!
For the best finish, try and make the sections of hair roughly the same thickness as the barrel of your curling iron. And wrap your hair behind the wand, rather than in front of it. This will make sure your curls flow away from your face. Much more flattering.
STEP 3 – Add some volume at your crown
Once you have finished curling your hair, take your comb and start backcombing the hair at your crown. Gently push your comb against your roots to create some serious body.
Now section off that hair so it’s out of the way. You’ll be wrapping it around your bun later.
You also need to clip a nice, thick section of hair from the side of your head out of the way for later.
STEP 4 – Create your low bun
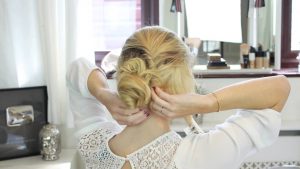
That timeless low bun is the star of this look. To make yours simply gather up your remaining hair into a low ponytail at the nape of your neck. To give the ends of your ponytail some volume, pull them out to the side, twist them around and push the hair up from the tips. This will make sure your bun is lovely and full.
Twist the ends around into a bun and secure them in place with your hair grips. Go nuts here, the last thing you want is a wobbly bun! The grips will be covered up later so use as many as you feel you need.
STEP 5 – Start wrapping
The next step is to let down that top section of hair you clipped out of the way earlier. Gently brush over the top of it to smooth any unruly strands of hair.
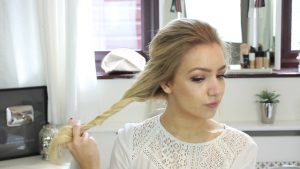
Then twist the ends of this section of hair before wrapping them clockwise around your bun. Use grips to secure and then (gently) pull apart the wrapped hair a little to make it look thicker and softer.
STEP 6 – More wrapping
Now do the exact same thing with that side section you clipped away. Twist the tips and this time wrap it anti-clockwise around the bun and secure. Again, you can gently pull apart the wrapped hair to add some extra oomph.
STEP 7 – Special final touches
Add a romantic touch by teasing out a few delicate strands of hair from around your face. This will frame your face beautifully and bring a soft, romantic feel to the look. A good spritz of hairspray will help keep everything in place.
Last but not least, pin your decorative hairpin above your bun. Choose a pin to complement your wedding dress – whether that’s vintage glamour or full-on bling.
And there you have it. A stunning, stress-free updo worthy of walking down any aisle. All that’s left is to have the best day of your life!
Check out how wonderful your hair can look in your own DIY wedding video. Stunning WeddingMix bride Kathryn had a great updo, just like the one in this tutorial and it looks fabulous!









Leave a Reply